Mapbase Basic Setup
A tutorial on basic setup of a singleplayer Source Engine mod using Mapbase.
At the end of this tutorial you will have a mod that is running on the community maintained Mapbase branch of the Source Engine 2013 branch. From there you can create a basic singleplayer HL2 campaign mod.
Because we are working off of Mapbase you will not even need to do any coding!
NOTE: This tutorial is for Windows only. There are currently no redistributable binaries for MacOS or Linux. If you want to use Mapbase and you are on either of those operating systems you will need to compile the code yourself.
Why you should use Mapbase
Here’s just some of the features you get access to by using Mapbase
- VScript scripting language support
- 80+ new entities and several filters
- Hundreds of new Inputs, Outputs, and KeyValues to existing entities
- Custom shaders
- Discord RPC
- The HL2:DM weapons (Slam & Stunstick)
- Skybox Updates including the ability to have a moving sky camera
- Support for NPC’s to use more weapons
- TF2/L4D2 style glow for entities
- Instructor System seen in newer Source Games (those popup hints)
- Func_precipitation particle rain system from Alien Swarm
- logic_playermovie and vgui_movie_display from Alien Swarm for playing bik videos in map
- vgui_text_display for drawing oriented text in world
I cannot stress enough that if you are making a Source Engine single player mod you should be using Mapbase.
What to Do If You Run into Issues
If you run into a problem the fastest way is to ask a question on the Steam Source SDK Forums, Reddit, the Mapbase Discord, or the Source Engine Discord. But do be sure to search the internet first, often someone else has already had the same problem and solved it!
Video Version of This Tutorial
Don’t feel like reading or need a visual aid? Check out the video!
NOTE: Because videos take a bit of work to create I often times update this written documentation long before I upload an updated video guide. Please read through this guide first if you run into an issue that might be caused by version difference.
Things You Will Need to Download
-
The latest build of Mapbase
-
Install Source SDK Base 2013 Single Player on Steam
Prompt Steam to Install or find it in the Tools section
Once installed right click and choose properties then go to the betas tab and choose “upcoming”
-
Notepad++, Visual Studio Code, or any other decent editor for working with text files that is NOT notepad or Word
-
Mapbase Compile Tools, we just need the VBSP compiler
-
SlammingToolsSP, we need the VVIS and VRAD compile tools
-
Hammer++ for Source SDK 2013 Singleplayer, we’re going to use Ficool2’s improved version of Hammer
-
7zip, it’s like normal zip but better. Some of the downloads such as SlammingToolsSP require this to unpack.
Mapbase Setup
Mapbase was designed such that the user could distribute their files but not have to distribute Mapbase’s files so that players who already have Mapbase installed do not need to have it installed multiple times. This is a good solution but however can lead to errors if changes are introduced in newer versions of Mapbase that break mods that were using a feature that has either been reworked or removed. To prevent this you can instead choose to pack all of Mapbases contents into your own mod but it will expand the file size of your mod by about 133MB as of this writing. This is not very large these days when most people have TB hard drives but still something to consider. It is worth mentioning that if you do plan to release on Steam you will need to use the method of packing Mapbase into your mod. The process of packing Mapbase into your mod can be done at any time so if you want to start with the External Directories method you can before switching over to the Completley Built-In method.
Both of the below methods are going to assume you want to make a mod using episodic content (HL2 Episodes 1 & 2). If you want just HL2 for some reason it should be easy enough to figure out what the differences are for setup.
NOTE: If you are familiar with C++ and are wanting to add your own entities (weapons, NPC’s, etc) then you should use the Completely Build-In section and setup your fork of the code to send the compiled DLL’s to the bin folder.
External Directories
This method is for those who do not want to distribute Mapbase and expect the player to already have Mapbase installed or can install it themselves.
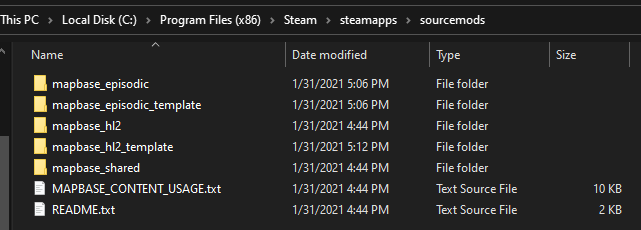
Extract the contents of the Mapbase build from the ZIP you downloaded into your sourcemods directory located in Steam\steamapps\sourcemods
Make sure you are doing this under your main Steam directory (the place where steam.exe is). If you try to do this under another directory like
E:\SteamLibrary\steamappsSteam will not recognize your mod!
Download the Mapbase Mod Templates from ModDB and then extract the contents of the ZIP into your sourcemods directory located in Steam\steamapps\sourcemods
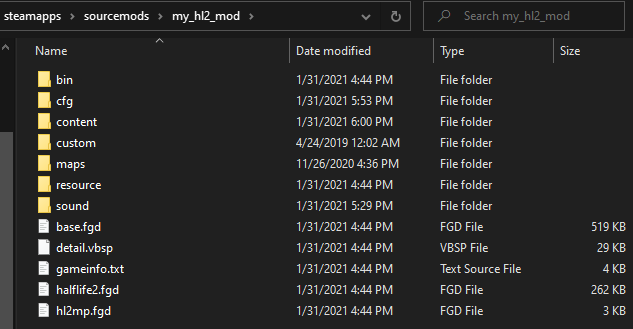
Select the mapbase_episodic_template directory and press F2 and rename it to the name of your mod. When naming it do not use capitals, non underscore special characters, or spaces. For this tutorial I have named it my_hl2_mod.
This is all you need to do for this setup. Jump to the gameinfo.txt setup.
Completely Built-In
This method is for those who want to pack Mapbase into their mod so players do not need to download it separately.
Extract the contents of the Mapbase build from the ZIP you downloaded into your sourcemods directory located in Steam\steamapps\sourcemods
Make sure you are doing this under your main Steam directory (the place where steam.exe is). If you try to do this under another directory like
E:\SteamLibrary\steamappsSteam will not recognize your mod!
Select the mapbase_episodic directory and press F2 and rename it to the name of your mod. When naming it do not use capitals, non underscore special characters, or spaces. For this tutorial I have named it my_hl2_mod.
Open up mapbase_hl2 in a separate window and copy over the skill.cfg file from the cfg directory from mapbase_hl2 into your mods cfg directory.
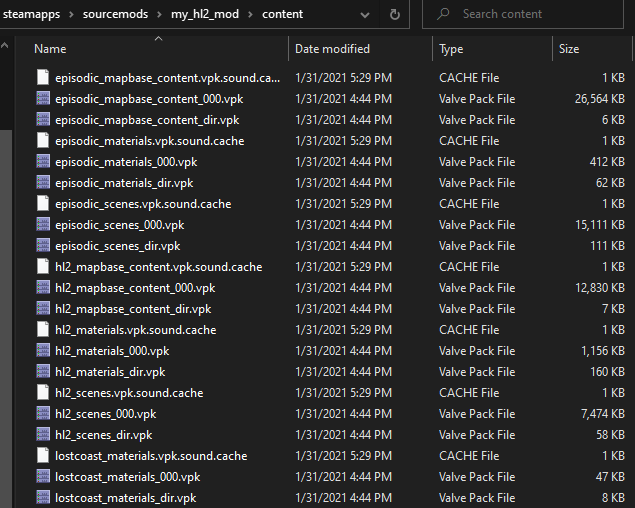
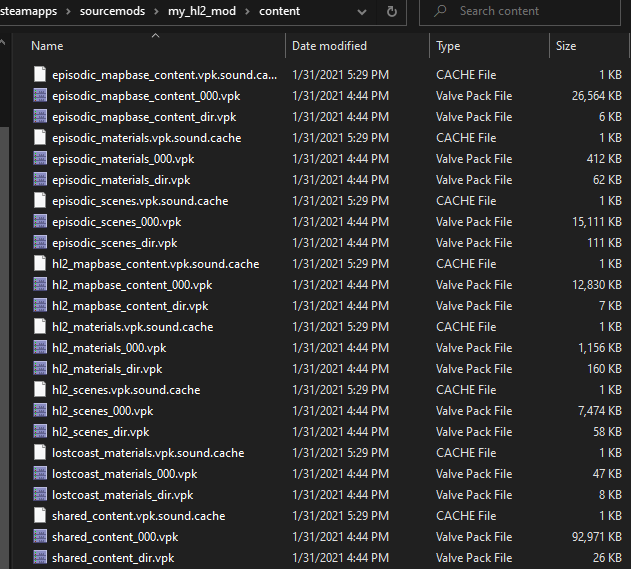
Next open up the content directory in mapbase_hl2 and copy everything in it over to your mods content directory.
In the mapbase_hl2 window go back until you are in your sourcemods directory and enter the mapbase_shared directory. Copy the two vpk files and the cache file into your mods content directory.
Open the shared_misc directory and then the bin directory and copy the three fgd files into your mods main directory.
Open your mods gameinfo.txt file in a text editor of your choice. Select everything inside of the gameinfo.txt and delete it. Then paste in this fixed up version so that the content gets properly mounted.
Gameinfo.txt setup
Open your mods directory and then inside open the gameinfo.txt file in your text editor. I am going to be using Visual Studio Code.
On line 3 you will see something like
game "My Episodic Mapbase Mod"
This line tells Steam what to call your mod. Go ahead and change it to your mods name. You can use capitals, special characters, and spaces here.
The next two lines (4 & 5) you have
	title 		"HALF-LIFE'"
	title2		""
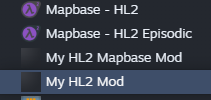
This is what will show up on your main menu. Go ahead and put in a title and a Subtitle if you want. Save the file and restart Steam. You should now see your mod in your Steam library.
If you do not see your mod listed in Steam this means you likely have a typo in your
gameinfo.txtsuch as a missing double quote
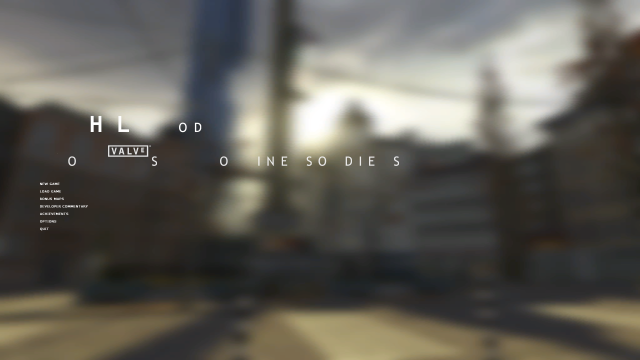
When you launch your mod you will probably find that your main menu titles do not look correct.
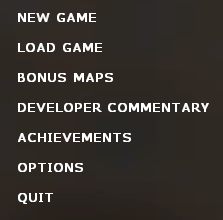
This is actually normal, the default font does not have all the letters of the English alphabet resulting in what you see. You’ll also notice we have a number of menu items that we probably do not want like achievements, bonus maps, and developer commentary.
Modifying the Main Menu
We’ll fix up our main menu a bit in these next two sections so that it looks a bit more normal.
Changing the Title Menu Font
First in your main mod directory create a directory called resource if it does not already exist.
You need a file called clientscheme.res which you can get from the Source SDK Base 2013 Singleplayer install in steamapps\common\Source SDK Base 2013 Singleplayer\hl2\resource or you can download a copy here off my GitHub. Place a copy of this file in your resource directory.
Open up clientscheme.res in your text editor of choice and go to line 631.
		ClientTitleFont
		{
			"1"
			{
				"name"  "HalfLife2"
				"tall"			"32"
				"tall_hidef"	"46"
				"weight" "0"
				"additive" "0"
				"antialias" "1"
				"custom"	"1" [$OSX]
			}
		}
This is the part of the file that defines what font will be used for the title. You could add a custom font here to use but for this tutorial we’re going to just use a default font, Verdana.
		ClientTitleFont
		{
			"1"
			{
				"name"  "Verdana"
				"tall"			"32"
				"tall_hidef"	"46"
				"weight" "0"
				"additive" "0"
				"antialias" "1"
				"custom"	"1" [$OSX]
			}
		}
Save the file and close it.
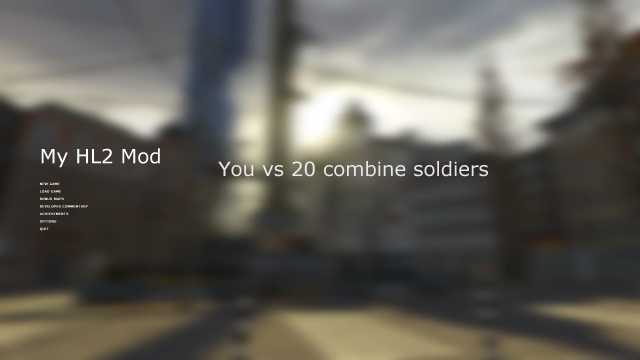
Launch your mod and check out the title screen.
If you want to learn more about fonts and how to modify them check out the Authoring and Using TrueType Fonts page on the Valve Developer Community.
Removing Menu Items
Looking at your main menu now you should see that you have a number of items that you are probably not going to be interested in.
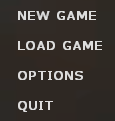
Let’s go ahead and remove Bonus Maps, Developer Commentary, and Achievements. If you are interested in these things for your mod check out the associated links but they will not be covered in this tutorial.
You need a file called gamemenu.res which you can get from the Source SDK Base 2013 Singleplayer install in steamapps\common\Source SDK Base 2013 Singleplayer\hl2\resource or you can download a copy here off my GitHub. Place a copy of this file in your resource directory.
Open up gamemenu.res in your text editor of choice.
Let’s break down how these entries work.
	// This is the position order. You can double it up with #_# for allowing more between entries
	"1"
	{
		// This is what text we want to actually display, the use of the # denotes it as being filled in from a language file for translation purposes
		"label" "#GameUI_GameMenu_ResumeGame"
		// This is the command we want to run when the player clicks on the button
		"command" "ResumeGame"
		// This is the in game ordering of the items, lower number means it is higher on the list
		"InGameOrder" "10"
		// This determines if the item should be visible when the player has paused the game or visible at all times. 0 = all time and 1 = only when paused
		"OnlyInGame" "1"
		// Should this only be visible in a single player mod/game, kind of pointless really considering you should just remove the entry
		"notmulti" "0"
	}
NOTE: Not all commands are valid, refer to this list
Using this information let’s comment out entry 8. You should be left with the following
"GameMenu"
{
	"1"
	{
		"label" "#GameUI_GameMenu_ResumeGame"
		"command" "ResumeGame"
		"InGameOrder" "10"
		"OnlyInGame" "1"
	}
	"5"
	{
		"label" "#GameUI_GameMenu_NewGame"
		"command" "OpenNewGameDialog"
		"InGameOrder" "40"
		"notmulti" "1"
	}
	"6"
	{
		"label" "#GameUI_GameMenu_LoadGame"
		"command" "OpenLoadGameDialog"
		"InGameOrder" "30"
		"notmulti" "1"
	}
	"7"
	{
		"label" "#GameUI_GameMenu_SaveGame"
		"command" "OpenSaveGameDialog"
		"InGameOrder" "20"
		"notmulti" "1"
		"OnlyInGame" "1"
	}
	"7_5"
	{
		"label" "#GameUI_GameMenu_ActivateVR"
		"command" "engine vr_activate"
		"InGameOrder" "40"
		"OnlyWhenVREnabled" "1"
		"OnlyWhenVRInactive" "1"
	}
	"7_6"
	{
		"label" "#GameUI_GameMenu_DeactivateVR"
		"command" "engine vr_deactivate"
		"InGameOrder" "40"
		"OnlyWhenVREnabled" "1"
		"OnlyWhenVRActive" "1"
	}
	// "8"
	// {
	// 	"label" "#GameUI_GameMenu_Achievements"
	// 	"command" "OpenAchievementsDialog"
	// 	"InGameOrder" "50"
	// }
	"9"
	{
		"label" "#GameUI_Controller"
		"command" "OpenControllerDialog"
		"InGameOrder" "60"
		"ConsoleOnly" "1"
	}
	"10"
	{
		"label" "#GameUI_GameMenu_Options"
		"command" "OpenOptionsDialog"
		"InGameOrder" "70"
	}
	"11"
	{
		"label" "#GameUI_GameMenu_Quit"
		"command" "Quit"
		"InGameOrder" "80"
	}
}
Notice that we didn’t need to do anything about Bonus Maps and Developer Commentary. That is because this gamemenu.res we are using does not contain entries for them and so we don’t need to worry about removing them.
Launching the game again we can see the menu has been updated.
Hammer Setup
If you haven’t yet make sure you have downloaded:
-
Mapbase Compile Tools: We just need the VBSP compiler
-
SlammingToolsSP: We need the VVIS and VRAD compile tools
-
Hammer++ for Source SDK 2013 Singleplayer: We’re going to use Ficool2’s improved version of Hammer
Installing Hammer++ and the Compilers
Now lets put this all together and get our mapping tools all setup.
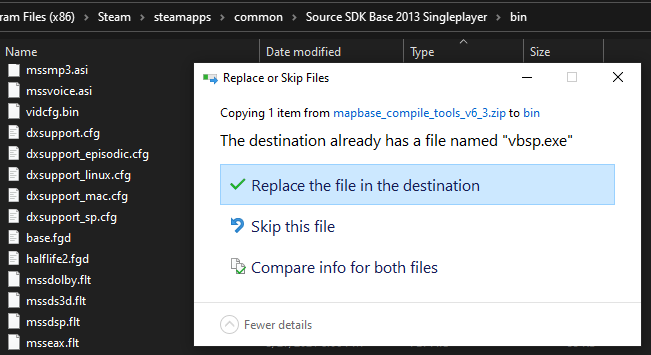
First open the Mapbase compilers you downloaded and copy the vbsp.exe into your \steamapps\common\Source SDK Base 2013 Singleplayer\bin directory. When you get the prompt telling you that the file already exists in the directory tell it to replace the file in the destination.
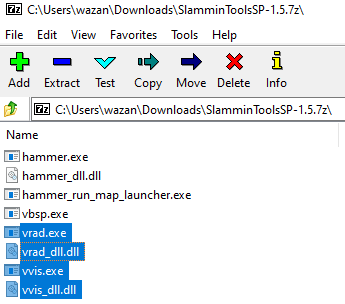
Now open the SlamminToolsSP.7z and copy over vrad.exe, vrad_dll.dll, vvis.exe, and vvis_dll.dll and once again tell it to replace the files when prompted.
NOTE: This requires you to have 7-Zip installed. 7-Zip is a popular and open source file archiver with a high compression ratio that out performs normal ZIP. You can download it from the official website
Open the Hammer++ zip and inside of the bin directory copy both the hammerplusplus.exe and the hammerplusplus directory into the Source SDK Base 2013 Singleplayer\bin directory.
Right click hammerplusplus.exe and choose Send To... then Desktop(Create Shortcut) if you would like a desktop shortcut or in Steam you can add it as a Non-Steam game for easier access in the future.
Configuring Hammer++
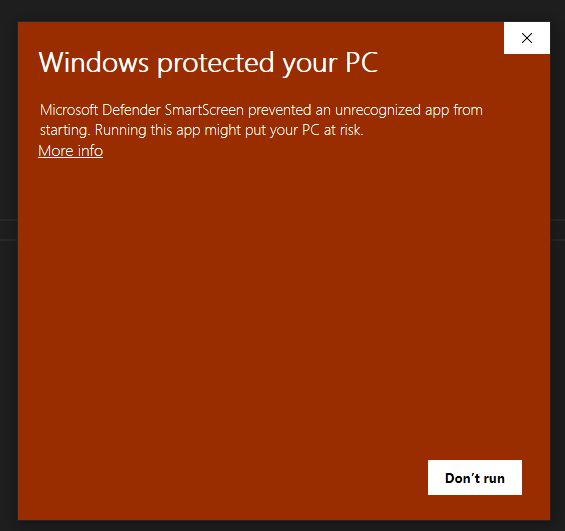
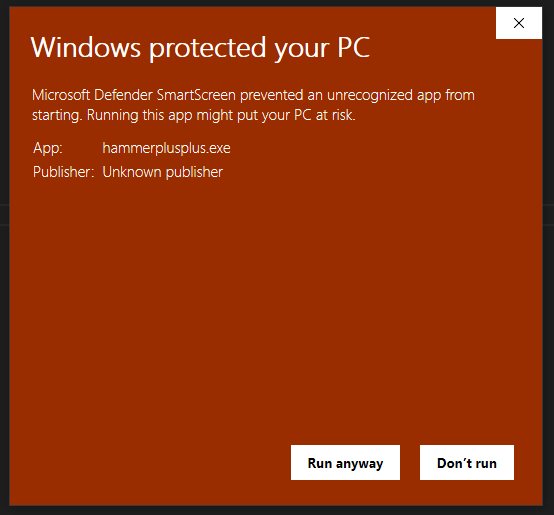
Run Hammer++ and you will probably get a warning from Windows about Defender Smart Screen protecting you from an unknown application being run. Click More Info and then Run anyway.
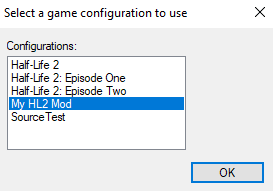
If you get a window asking you to select a game configuration to use select Half-Life 2.
Once in Hammer++ click Tools then Options.
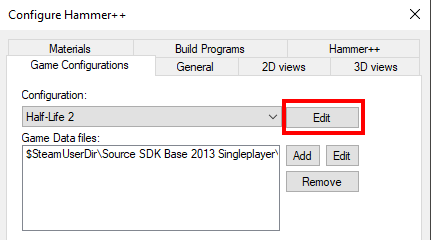
In the Game Configurations tab click Edit in the Configuration section.
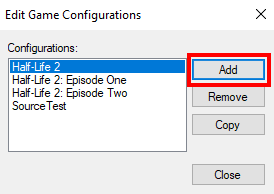
Click Add.
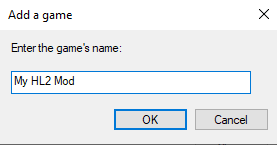
Put in your mods name and click OK.
Click Close on the Edit Game Configurations menu.
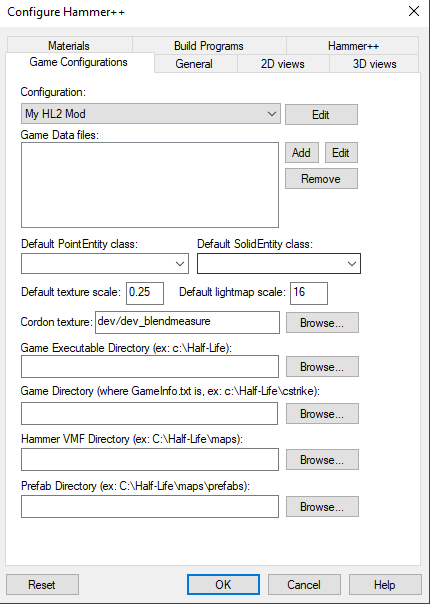
Click on the drop down menu under Configuration and change it to the name of your mod.
Click Add next to Game Data Files otherwise known as FGD’s. These contain the definitions of entities so that Hammer knows what entities we can use and what they should look like in the editor. A common misconception is that FGD’s create entities, they do not. You can think of an FGD like a language translation book for Hammer on how it can speak to the Source Engine. If you provide it an FGD with a bad entry that the Source Engine does not understand it will ignore it.
The first one to add is Hammer++’s custom one that adds particle rendering, particle browsing, and editor only 3D world text. It’s going to be located in steamapps\common\Source SDK Base 2013 Singleplayer\bin\hammerplusplus and will be called hammerplusplus_fgd.fgd.
Next we’re going to add the Mapbase FGD, halflife2.fgd. If you are using the External Directories method your FGD will be located in Steam\steamapps\sourcemods\mapbase_shared\shared_misc\bin. If you are using the Completely Built-In method it is going to be in your mods main directory. Go ahead and add it now.
End result will look similar to this
Change your default PointEntity class and SolidEntity class to whatever you would like, I personally prefer info_player_start and func_detail.
Now we’re at the default texture scale, default lightmap scale, and the cordon texture. Leave texture scale at 0.25 and lightmap scale at 16. For cordon texture this is going to be the texture drawn when you use the cordon tool. Common choices are tools/toolsskybox and tools/toolsblack.
For Games Executable Directory we want to use $SteamUserDir\Source SDK Base 2013 Singleplayer as this is where the actual exe is located.
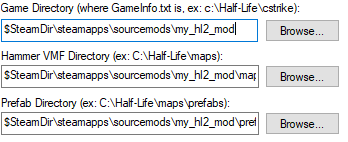
The next entry, Game Directory, needs to be the main directory of your mod.
After that the Hammer VMF Directory is where you want the default save location for your maps to be. The example given is the maps directory for your mod but this is not recommended. Instead you should be using a backup system like Google Drive, Dropbox, Mega, or one of the other many available so that you have automated backups of your maps in case something happens to your computer. The Prefabs Directory is another one in which you probably want to use a backup solution for but these days most people are using instances.
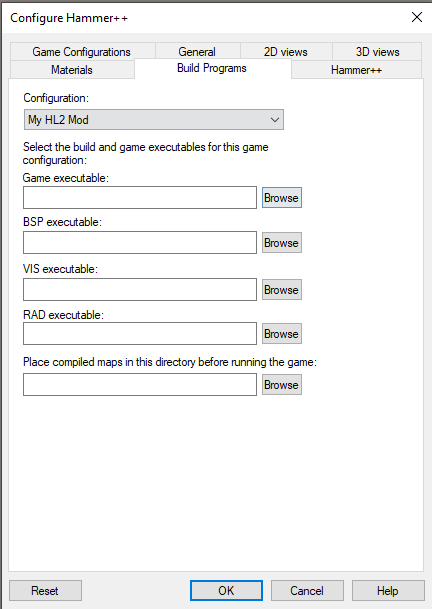
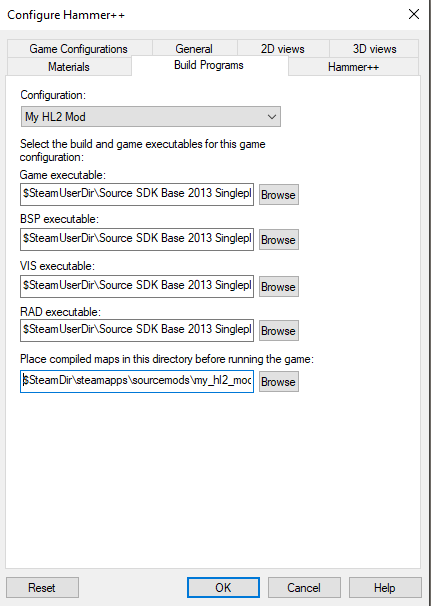
Now switch to the Build Programs tab.
The following you can just copy paste the path into.
Game executable: $SteamUserDir\Source SDK Base 2013 Singleplayer\hl2.exe
BSP executable: $SteamUserDir\Source SDK Base 2013 Singleplayer\bin\vbsp.exe
VIS executable: $SteamUserDir\Source SDK Base 2013 Singleplayer\bin\vvis.exe
RAD executable: $SteamUserDir\Source SDK Base 2013 Singleplayer\bin\vrad.exe
The last section is in regards to where the compiler should put your compiled map (bsp). We want this to be our mods maps directory so go ahead and browse to that and select it.
You should now have something that looks like this
Click OK and then restart Hammer++ making sure to select your mods name in the window that appears.
Congrats you are now ready to start making maps for your mod!
Mapping Resources
If you are new to mapping the following are some resources to help you out.
- TopHATTwaffle’s Tutorial v2 Series is one I highly recommend
- VDC Level Design Category
- VDC Half-Life 2 Level Creation
- Interlopers.net
- My writeup on an intro to optimization
- Source Modding
- An arhcive of the Halfwit2 tutorials I saved
What to do Next
Congratulations you have a bare bones single player mod to being working with! From here you should decide if you are going to add chapters or perhaps work entirely off bonus maps and let your players pick and choose what maps they want to play.

